Your artwork, your tested guest link
Build wedding stationery around the real collection code
Already designing your menus and invitations? You can place a wedding photo QR code in Canva as an image and create matching stationery around it. This is a manual artwork workflow: Candid Photos supplies the collection's guest code, while you arrange the surrounding design in Canva. There is no native connection that keeps the two projects in sync, so checking the source, final export and printed result is part of the job.
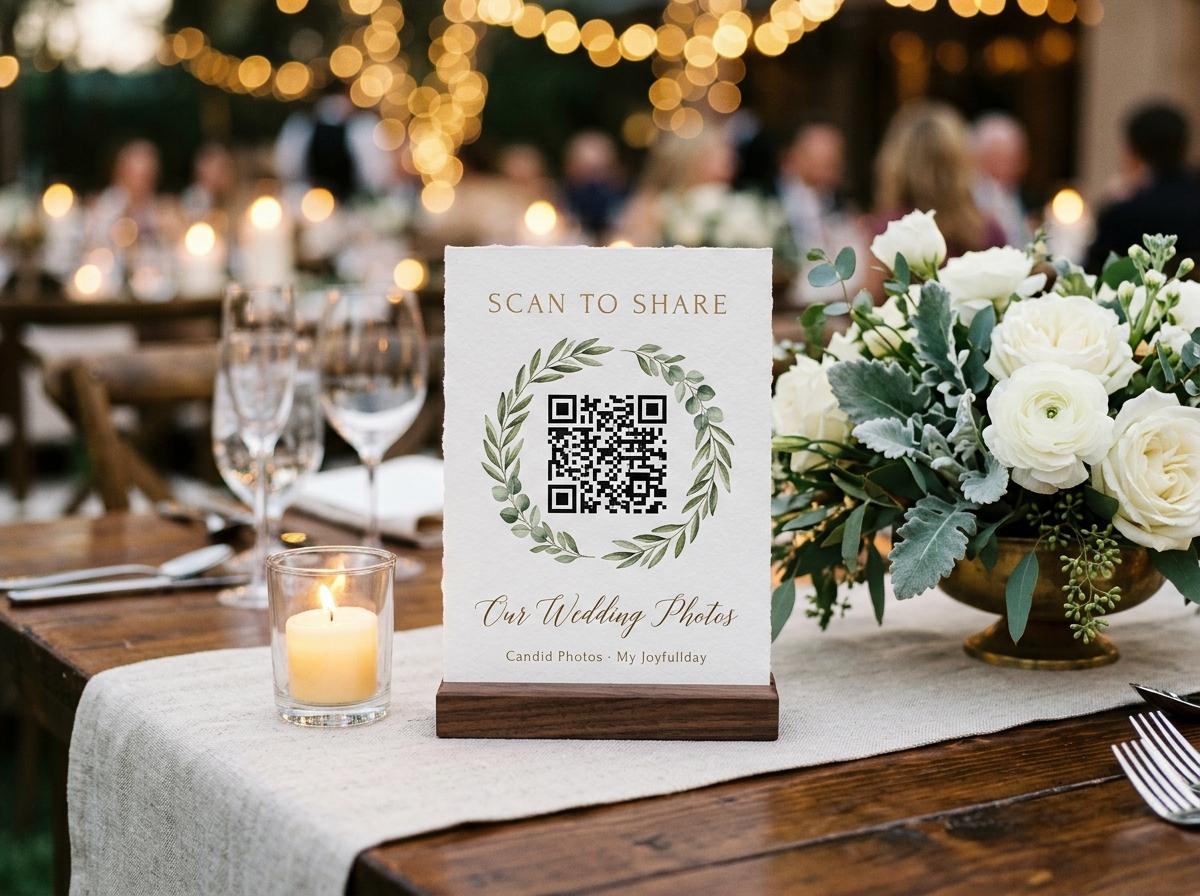
Choose whether custom artwork is worth the work
A custom design is useful when the photo invitation needs to sit within a stationery set you are already making. It is not necessary just to give guests a working code. Candid Photos provides printable QR table stands from the dashboard, with four stands on one A4 sheet. If that solves the practical problem, using the supplied layout avoids another source file, another export and another opportunity to place the wrong square. Start with the simplest route that fits your wedding.
Use the supplied stationery
- Choose this when the priority is a straightforward table invitation and you do not need to recreate the layout elsewhere. Print an assembled sample, check the guest destination and test it among the table settings.
- The dashboard's printing workflow is separate from Canva. Its existence does not mean there is a Canva template library, automatic transfer or a promise that every element of the supplied design can be edited in another tool.
Make your own surrounding artwork
- Choose this when you want a welcome-board panel, invitation enclosure or coordinated menu area. You supply the layout and copy, place the actual QR image manually and take responsibility for the finished production proof.
- Keep the design project and the collection clearly labelled. A change to the event or its destination does not automatically replace a QR image in your Canva design, and an artwork edit does not update paper already printed.
Get the actual QR image from the event
Open the wedding's QR page
Confirm that you are looking at the real event rather than a test collection. Read the names and guest address before downloading. If several family celebrations have similar names, add a clear event identifier to your local source filename.
Download the supplied image
The dashboard offers Download High-Res PNG (1200px) for the collection's QR code. Use that image as the source for your layout. Do not substitute a screenshot containing surrounding dashboard controls or a small preview copied out of a message.
Keep the guest address with it
Copy the collection's guest link separately for the human-readable line in your artwork. Do not use a host management URL or a slideshow address. The code and the written link should both serve guests who want to contribute.
Check the source before styling
Scan the downloaded image on another screen or on a quick paper proof and open the guest destination. Fix an incorrect event source now, before placing the same image into several coordinated stationery pieces.
Set the physical canvas before placing details
Decide what you are making and how it will be produced before choosing type or flowers. A table insert must fit the visible opening of its holder. An invitation enclosure must fit the envelope after folding. A welcome-board panel has to remain readable at the place where people can safely stop. Set up the artwork for that intended physical format in your design tool, and ask the printer about trim and bleed if those apply to the job.
- For a table insert
- Measure the area above the holder lip, not just the loose paper. Reserve a flat, unobstructed region for the QR image and readable instructions. If the holder obscures the lower edge, move the guest address rather than shrinking everything to compensate.
- For a folded piece
- Mark which parts will become the front, reverse and fold before placing the image. Keep the QR code completely on one panel. Print a rough copy, fold it and check the orientation before adding detailed decoration.
- For a large board
- Think of the code as a close-up element within a larger greeting. Plan where a standing or seated guest can aim a phone, then choose trial dimensions. The board's overall size is not evidence that its smallest detail will scan.
Import the PNG without redesigning the pattern
Add the downloaded PNG to your Canva project as an image and place it in the reserved area. Keep it square when resizing. Preserve the image's white surround instead of cropping tightly to the dark marks, and leave more plain space outside the image. Do not use a decorative photo frame that cuts corners or a treatment that makes the light areas transparent over patterned paper. The square is a functional address, not an illustration that needs to adopt every part of the wedding palette.
- Use the original downloaded file for each stationery format rather than a screenshot of a previous design. A screenshot can reduce detail and quietly add compression or scaling artefacts before the printer ever sees it.
- Keep names, rules, florals and other graphic elements outside the code's clear surround. Do not place a monogram across the centre or assume that the code's ability to tolerate some damage makes intentional obstruction a good design choice.
- Leave the dark-on-light image treatment intact for your first proof. Put wedding colours in the surrounding text or border instead of recolouring the pattern to a pale shade that may be hard for a camera to distinguish.
- Check that the placed image has equal width and height. If the layout feels too narrow, change the surrounding composition rather than compressing the square into a rectangle.
Write a hierarchy instead of filling every gap
Give the reader three things in a clear order: what this is for, what to do and whose wedding it belongs to. The names can be decorative; the instructions should be ordinary and easy to read. A useful short version is Share your wedding photos. Scan with your phone camera and tap the link. A few favourites would mean a lot to us. Put the written guest address on its own line, outside the QR image's clear area.
Let the action carry the design
Share wedding photos is more informative than a heading such as The magic continues on its own. You can keep a personal heading if the next line explains the action. Do not make a guest infer whether the code opens a menu, gallery or reply form.
Match the destination's settings
If guest browsing is switched off, do not promise a gallery everyone can explore. If you only want photographs, there is no need to advertise every possible contribution type. The printed wording should describe the experience you have actually prepared.
Use the back deliberately
A reverse panel can carry longer instructions when it is genuinely accessible, but the first visible face still needs a useful invitation. Do not put the only working code on an inward-facing panel that appears after the tent is unfolded.
Export according to the real print job
The final output should suit your printer, not a generic online tutorial. Ask what file type, page dimensions and finishing information the printer needs, then use an appropriate output available in your Canva account. Available options can depend on the tool and account, so this guide does not promise a particular Canva download control or a Candid Photos export package beyond the verified QR PNG. Open the exported file itself and inspect it before sending it on.
Check the page size
Confirm that the exported artwork has the dimensions you intended and that no automatic resizing has changed the QR image. Keep important text and the code away from trim and fold areas, allowing the clearances requested by the printer.
Check image appearance
Zoom in on the QR pattern and look for blurring, clipped corners, changed transparency or an unexpected background. A sharp editing view does not prove that every later conversion will preserve the source in the same way.
Send a versioned final file
Give the printer one clearly named approved export rather than several files called final. Keep the original PNG and editable artwork separately so a requested correction can be made without extracting the code from a compressed proof.
Make a proof that includes the awkward parts
Print at the intended scale, then cut, fold, mount or cover the sample as it will be used. For a handheld insert, you might trial complete QR image widths of 30, 40 and 50 mm. For a board, try larger candidates at the actual approach distance. These are starting experiments, not guaranteed QR specifications. Keep enough white space around the image, and test the final stock and finish because glare and texture can matter as much as size.
- A table proof
- Put it beside a glass, menu and a stand-in for the flowers. Scan from a chair on both sides of the table. If the design only works when picked up and held squarely under a bright light, revise it before making the whole batch.
- An entrance proof
- Mount it at the intended height and angle. Check whether the usable scanning position blocks the doorway. Test from a seated position as well as standing, and keep the readable address within a comfortable reading area.
- A destination proof
- Follow the code all the way to the guest page and make a small permitted test submission. Type the written address independently. A beautiful export can contain one correct route and one mistyped route, so both need checking.
Manage revisions across the stationery set
Once the same code appears on a menu, table tent and welcome board, one correction can become three separate jobs. Keep a simple list of the pieces that contain it and which source file they use. If you change the collection destination, revisit every piece manually. Do not assume the Canva artwork knows that an event has changed. Likewise, resizing a design for another format can reduce the code or move text into its border even when you did not touch the image directly.
At the first approval
Keep the tested reference
Save the exported proof and note the printed QR width, stock and holder. This gives the stationer or helper a practical reference if another piece needs to match the working design later.
After a revision
Repeat the relevant tests
A wording change may alter spacing; a new paper finish may alter glare; a new destination requires a fresh source check. Test the changed object rather than assuming the previous proof still covers it.
At final handoff
Remove ambiguity
Tell the printer and coordinator which version is approved and where each piece belongs. Keep old drafts out of the print bundle so someone trying to help does not reintroduce a superseded code or layout.
Keep artwork costs separate from collection limits
A design tool, printing service, special paper or holder may have its own cost. Those purchases do not increase your collection allowance. Candid Photos paid plans are one-off per event in USD: Gather is $19 for 200 photos, 30 videos, 5 GB, a written guestbook, standard downloads and 1 month online. Celebrate is $39 for 750 photos, 100 videos, 20 GB, original-quality downloads, a slideshow, a video guestbook and 3 months online. Keepsake is $69 for 2,000 photos, 300 videos, 50 GB, two extra managers and 6 months online.
Included retention runs from the event date. Preview is a free test with 20 photos, no video, 10 contributing guests, 500 MB and 7 days online, without downloads. You can use a small test to understand the guest journey before ordering expensive stationery, but choose the wedding's real capacity before broad distribution. A larger or more decorative printed code does not change what guests can contribute. Arrange your own download and backup before the collection closes; the design file is a record of the invitation, not a copy of the wedding photographs.
Canva workflow questions without assumed features
Is there a native Candid Photos integration in Canva?
No native integration is being offered in this workflow. You download the actual collection QR PNG, add it to your design manually and check the result yourself after any changes.
Are the dashboard stands editable Canva templates?
The dashboard has its own printable table-stand workflow. Do not assume those designs are supplied as editable Canva templates; use them directly or make your own surrounding artwork with the downloaded QR image.
Should I generate a replacement code inside my design tool?
Using the supplied collection image avoids introducing another generator or mistyping the destination. If you use any other source, independently verify the encoded guest destination and any dependency it adds before printing.
Can I send the design without a paper test?
You can share a digital draft for review, but it does not establish that the finished object scans. Approve a physical proof at the final size and finish before treating the stationery as ready for the wedding.
Start with a verified code, then make it your own
Create the wedding collection and download its actual QR image. Build the surrounding artwork in your chosen design tool, preserve the working pattern and test the finished print before sending the full order.
QR code photo sharing
Put one link on the tables and let everyone contribute.
Create a collection, print the table stands, and the photographs your guests took are waiting for you the morning after. Guests never install anything and never make an account.