From a chosen picture to a completed upload
Help guests send a photo and know it arrived
A clear set of wedding photo upload instructions for guests should answer the questions that arise in order: which link, which pictures, what details and how do I know I am finished? Keep the printed version short, then offer help for the less obvious cases. Guests use their browser without an account, app or password. They still need an internet connection, files they want to share and time to let the transfer finish.
Prepare one short route and one place for help
Separate what every guest needs from what only a few will need. The main instruction can fit on a small sign or in a message: open this wedding's link, choose the photographs you want to share, follow the form and wait for the upload result. A longer guide can explain file selection, connection problems and visibility. Putting every possible problem on a table sign makes the first step harder to find. It can also make a straightforward contribution feel like a technical commitment before anybody has opened the page.
Before writing your instructions, use the guest route yourself. Note the actual event name, available upload options and details the form requests. Do not write a guide from memory of another service. Your event might accept photographs but not videos, or receive uploads without letting guests browse the collection. Choose one person guests can contact if they get stuck, and give that person the same tested address. The helper can explain the process without needing your account password or taking control of anybody's phone. Make optional participation part of the instructions, not a footnote revealed only when someone asks to stop.
Open the wedding page from a link or a code
If the invitation is already on your phone, use its link
Select the guest address in the host's message or the descriptive photo link on the wedding website. There is no need to scan a code displayed on the same phone. Check that the page names the wedding you attended before choosing files. If it opens an unrelated event or a host login, ask for the correct guest address.
If you are reading a printed sign, try the camera
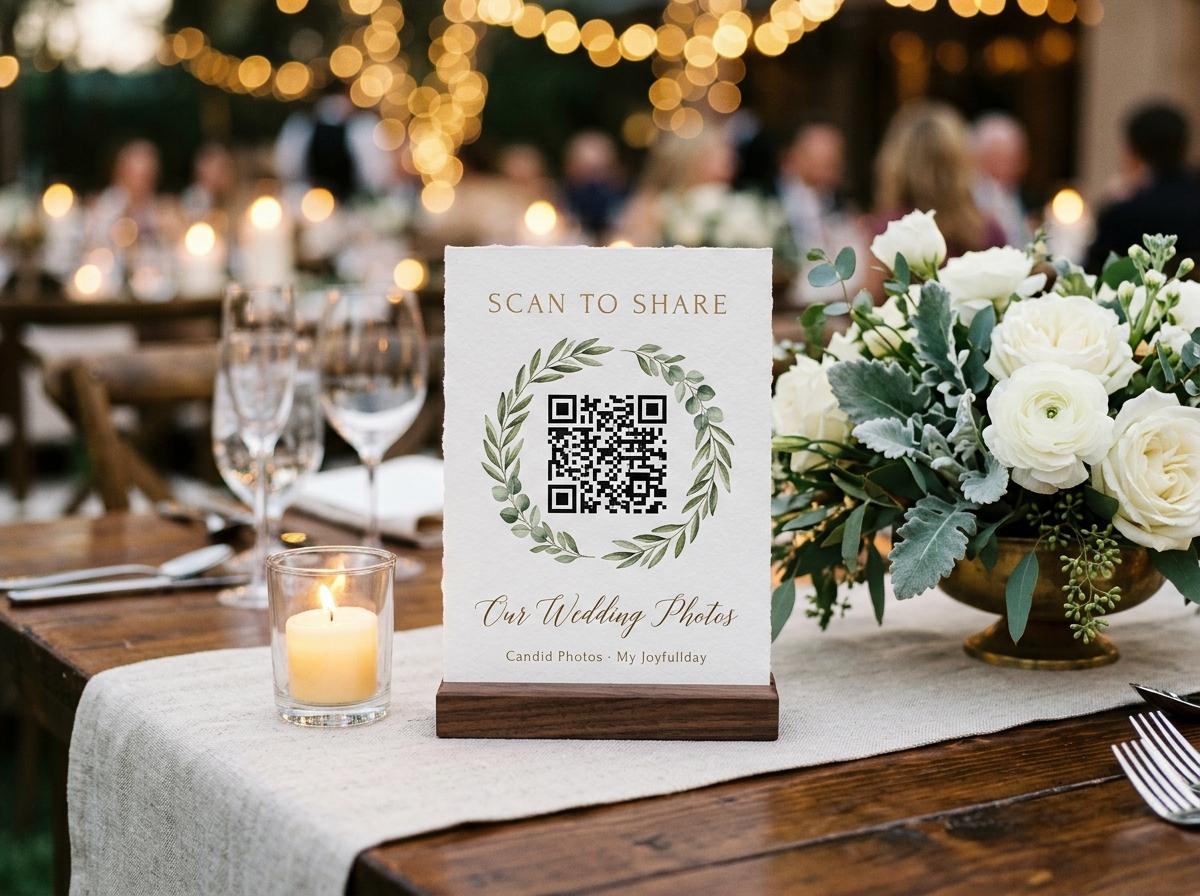
Point your phone's camera at the QR code and use the link prompt if your device offers one. Keep the whole code in view and move away from glare. You do not need to photograph the code as a keepsake before using it. If your camera does not recognise it, use the printed web address instead of repeatedly trying the same angle.
Check the destination before entering details
The hosts should identify the wedding beside the code and on the guest page. An unfamiliar sign in a shared venue is not enough context by itself. If a page asks you to purchase access or install software to upload wedding photographs, stop and check with the hosts rather than assuming this is the intended route.
Use a connection you are comfortable with
Opening a page and sending files require internet access. A QR code contains an address; it does not provide Wi-Fi or make an offline upload possible. If venue Wi-Fi needs a separate sign-in, complete that according to the venue's instructions. You can also keep the link and return on a suitable connection later, within the collection's online period.
Choose the files before handing them to the uploader
- Find the wedding date in your own library
- Look through your photographs privately and decide which ones you are comfortable contributing. You do not need to show the host your entire camera roll. Select a small group of favourites rather than everything between two dates, which could include screenshots, travel documents or unrelated personal pictures.
- Prefer the actual photograph to a screenshot
- If the original picture is available on your device, choose that file rather than taking a screenshot of its preview. A screenshot can contain interface elements or lose useful detail. If your library stores the full file elsewhere, allow it to become available on your device before attempting the upload. The exact controls depend on your phone and photo service.
- Review what is in the frame
- Check the background as well as the main subject. Avoid sending a picture that exposes a private message, a room number or somebody who asked not to be photographed. For pictures involving children, follow the relevant parent or guardian's wishes. Being able to select a file does not mean everyone pictured has agreed to the collection's audience.
- Start with a manageable selection
- One photograph is a useful first contribution, and a small batch is easier to inspect than a large mixed selection. There is no duty to edit or send a certain number. Video availability depends on the event's plan and remaining capacity, so check the page rather than assuming that every collection accepts every kind of file.
Follow the guest form without creating an account
Open the upload option on the guest page and follow the fields shown. The guest form asks for identifying details such as your name and email, and asks you to read and accept its consent information. This is not the same as registering for an account: guests need no password and no app. Enter your own details rather than borrowing another guest's identity. If the device remembers a previous contributor, check the displayed identity and change it when it is not yours. A shared phone should not silently attach one person's name to another person's contribution.
Understand the consent before proceeding
Read the information presented and ask the hosts if the intended audience is unclear. Do not have a helper accept on your behalf without your understanding and agreement. If you do not want to proceed, stop. The couple can appreciate your presence without receiving a file, and assistance should not remove your opportunity to decline.
Choose only the files you intend to send
Use the device's file or photo picker to select your prepared photographs. The uploader can begin sending once the required details and consent are in place, so make your selection deliberately. Do not rely on a separate final send button to provide another review stage. If the device offers a choice about library access, use an appropriate limited selection where available.
Read the upload status
After selection, return attention to the page and watch what it reports for the chosen files. A picker closing is not confirmation that the transfer finished. Keep the page available while it works and do not repeatedly add the same pictures because the gallery has not changed yet. A reported failure needs a different response from a file that is still sending.
Distinguish a completed transfer from a visible picture
The upload result is your first checkpoint. Look for the page's confirmation that the selected files reached the hosts, and check whether any files are reported as failed. If you selected several items, one successful item does not prove that all of them completed. Avoid leaving solely because a thumbnail appears in the upload list; a local preview can exist before the full file has finished travelling. Keep your own copies until you are satisfied with the result, and do not delete wedding photographs from your phone just because you opened the upload page.
- Sent, but not visible to other guests
- The hosts may have enabled the approval switch and need to review the submission. Ask them to check receipt if you are uncertain. Re-uploading the same file is not a way to move it through review and may create extra work.
- Sent, with no gallery to open
- The hosts can switch off the public gallery so the guest page is upload-only. In that arrangement, successful delivery does not lead to browsing everybody's pictures. Follow the confirmation rather than searching for a gallery that was never part of the invitation.
- Only part of a batch completed
- Note which items failed and follow the page's available retry guidance for those items. Do not start by resending the whole selection. If the reason is unclear, ask for help with the reported message and keep the original files available.
Handle a stalled upload without guessing or duplicating
- The page does not open
- Check the address and the internet connection first. If a QR scan fails, use the typed link; if the typed link also fails, ask the host to verify it. Trying another file will not fix a page that has not loaded. A closed collection also needs a host decision rather than a different camera setting.
- The connection is slow or unstable
- Wait for the current status to become clear instead of repeatedly tapping or switching networks mid-transfer. If the page reports a failure, try a smaller selection on a stable connection when convenient. Do not spend the reception troubleshooting mobile data if you would rather enjoy the celebration and upload from home.
- A file is refused
- Read the reason on the page. The issue may involve the file itself, the event's available allowance or the remaining storage. Ask the host about the event limits before changing a photograph unnecessarily. Do not rename a file extension and assume that turns it into a supported format; a filename is not a conversion.
- A video takes longer than a photograph
- A larger file can take more time to transfer, and a clip may also need to become available from the phone's own storage service first. Confirm that this event accepts video. Keep a copy and try later if needed, rather than promising that every connection can finish a long clip during the next song.
Print a brief version that guests can actually use
The following is an example of host-written instruction copy, not a product-generated sign or a fixed description of every device. Put the wedding name above it, the tested QR code beside or below it and a readable version of the actual guest address nearby. Use generous text size, plain type and strong contrast. A beautiful code surrounded by unreadable instructions is not a useful invitation. Proof the physical print in the room's likely lighting, not only as a bright design preview on a laptop.
Example: short instructions for a printed sheet
- Open our guest link, or scan the code with your phone camera. Check that the page shows our wedding names.
- Choose a few photographs you would like to share. Please respect the wishes of the people pictured; taking and uploading photos are optional.
- Open the upload option, enter the requested details and read the consent information. Guests do not need an account, app or password.
- Select your chosen files and wait for the upload result. If anything fails, keep the files and ask us for help rather than sending the entire batch again.
- You can return later using the same link, before the collection closes. For help, ask [named helper] or contact [host's chosen private contact].
Check capacity before distributing instructions widely
Instructions should describe what this event can receive, not everything available across the service. Preview is free and includes 20 photos, 10 contributors, 500 MB and seven days online, with no video uploads or downloads. Gather is a one-off $19 USD per event with 200 photos, 30 videos, 5 GB and one month online, plus a written guestbook and standard downloads. A test run on Preview is useful, but do not hand a large wedding a trial link while implying that its capacity is unrestricted.
Celebrate is a one-off $39 USD per event with 750 photos, 100 videos, 20 GB and three months online; original-quality downloads, a slideshow and a video guestbook are included. Keepsake is a one-off $69 USD per event with 2,000 photos, 300 videos, 50 GB and six months online, adding two extra managers to the included features of Celebrate. Paid plans allow unlimited contributors, not unlimited files or storage. Check the actual remaining allowance before asking for a fresh batch, and give guests a preferred date that leaves the hosts time to review and download. None of this pricing needs to appear on the guest instruction sheet; it is preparation the host should finish before making the invitation.
Questions guests ask halfway through the process
Do I have to take a new photograph through the website?
No. You can choose wedding photographs already available on your device. Select only the files you want to contribute, and do not feel obliged to stage a new picture simply because the upload link is available.
Can I upload from a computer later?
The guest link opens in a browser, so you can use it on a suitable connected device that has access to the files. Keep the correct address and check the collection's closing date. If your pictures are on a camera, first transfer the chosen files using your usual method.
Does scanning the QR code upload my camera roll?
No. Scanning opens an address; you still choose files and follow the guest form. Review your selection and the device's permission choices rather than granting access without reading what is being requested.
Can someone help without using my password?
Yes. Guest uploading does not require an account password. A helper can talk you through the page while you keep control of your device, choose the pictures and make the consent decision yourself.
Try the route once before you explain it
Set up the wedding collection and test a small contribution as a guest. Then write instructions that match the page, print a readable address beside the code and name a willing helper. The aim is a clear beginning and a recognisable finish, not a guest technical support project.
Wedding photo sharing
Put one link on the tables and let everyone contribute.
Create a collection, print the table stands, and the photographs your guests took are waiting for you the morning after. Guests never install anything and never make an account.